We can rebuild her — we have the technology

“Flight com, I can’t hold her! She’s breaking up! She’s breaking—”.

The image of a rusted red two-wheeler rocketing through the atmosphere. The bike hits the ground at 250 mph and tumbles six times.

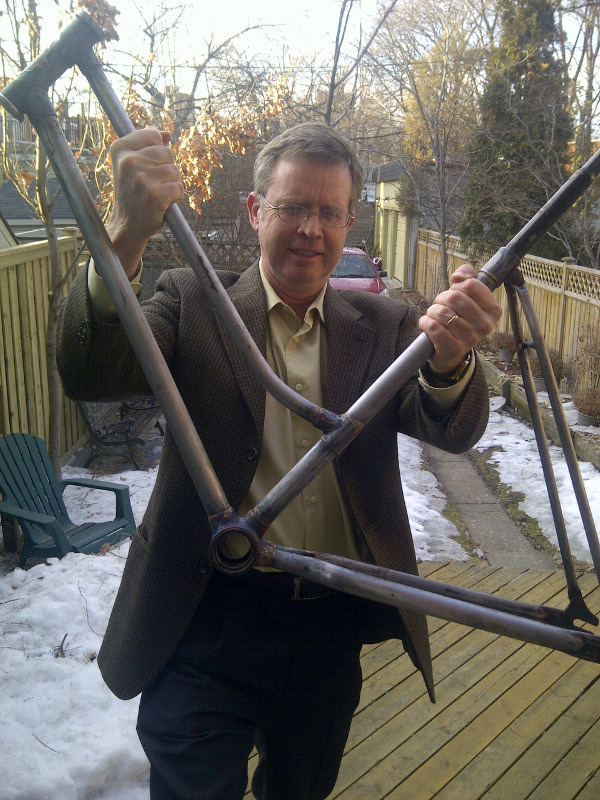
The 1964 CCM, vintage one-speed. A bicycle barely alive.  Bought for a song at a Kingston antique market after re-entering earth’s atmosphere.

Gentlemen, we can rebuild her. We have the technology. We have the capability to make the world’s first bionic bike. The vintage 1964 CCM Ladies one-speed will be that bike. Better than she was before. Better…stronger…faster.

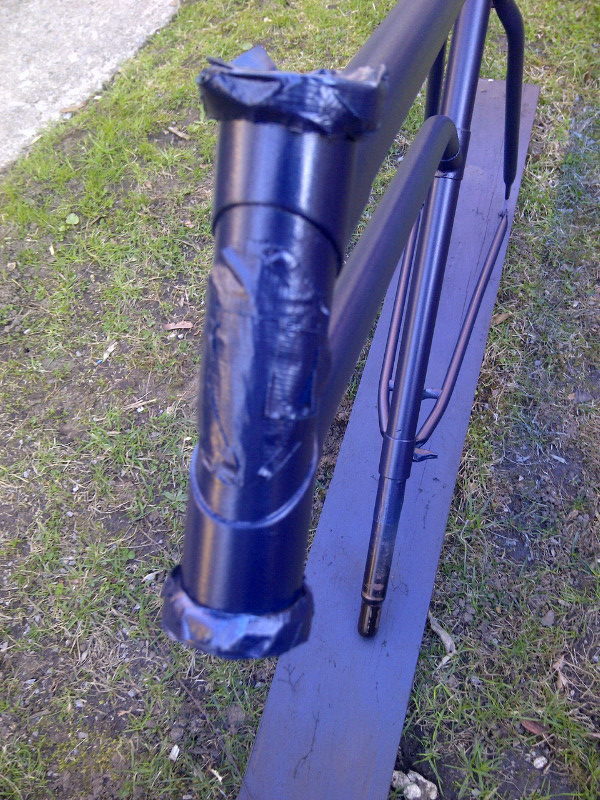
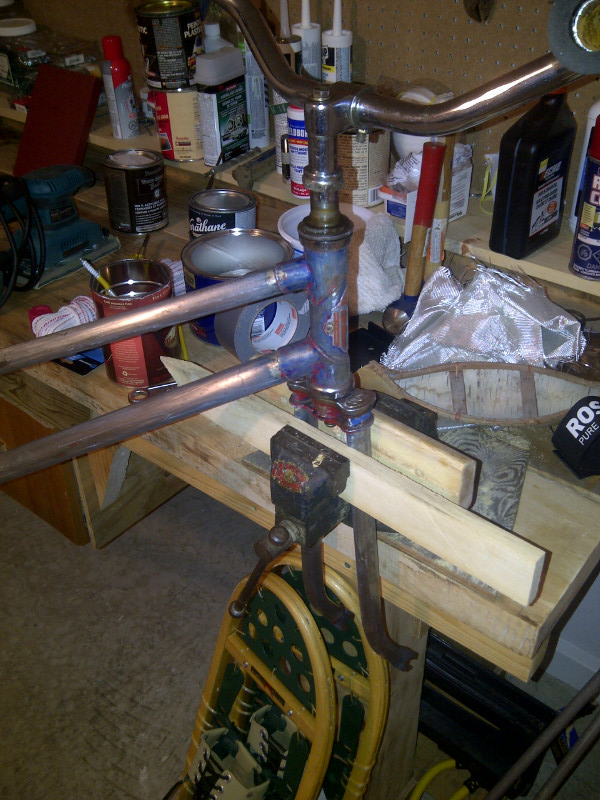
Cue music as the bike’s frame is lifted up from the makeshift painting booth consisting of a broken 1×6 from the neighbor’s fence and suspended with cheap yellow nylon rope from the rafters of the kinross cordless workshop.

A high-tech imaging machine rattles off diagnostics and rebuild checkpoints:

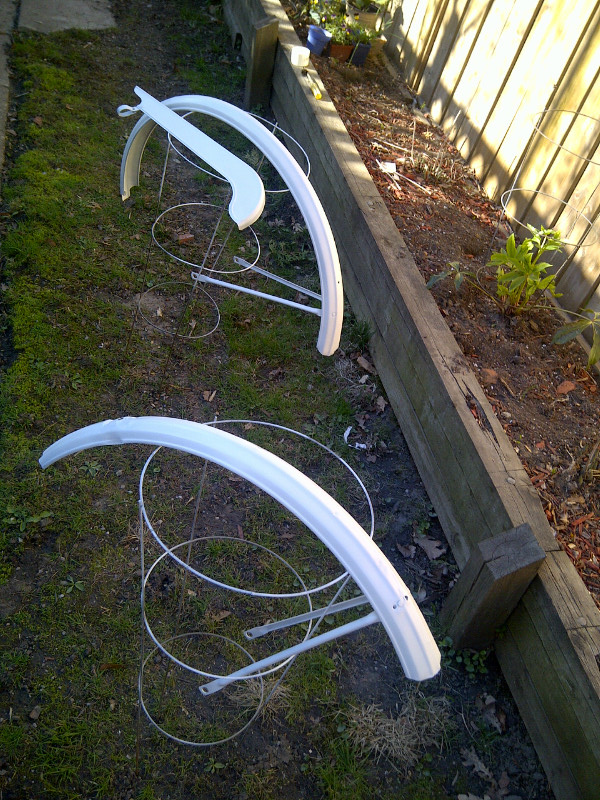
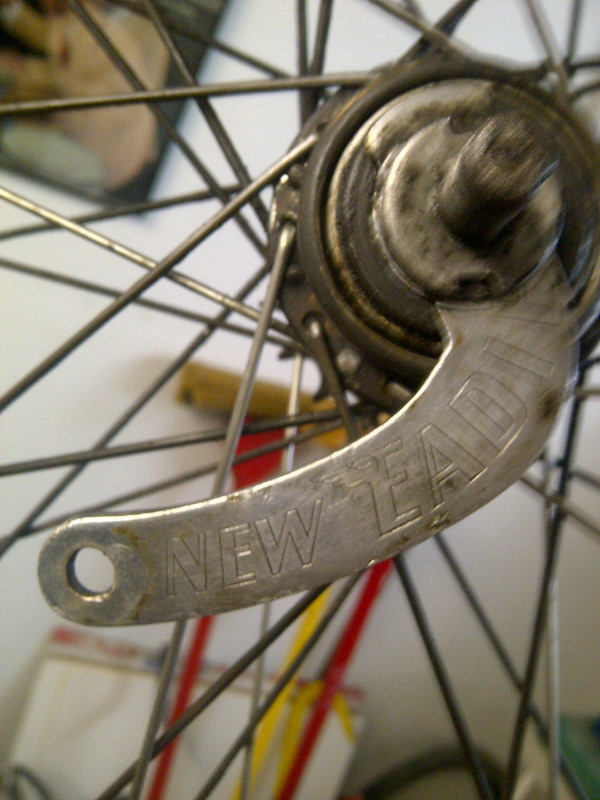
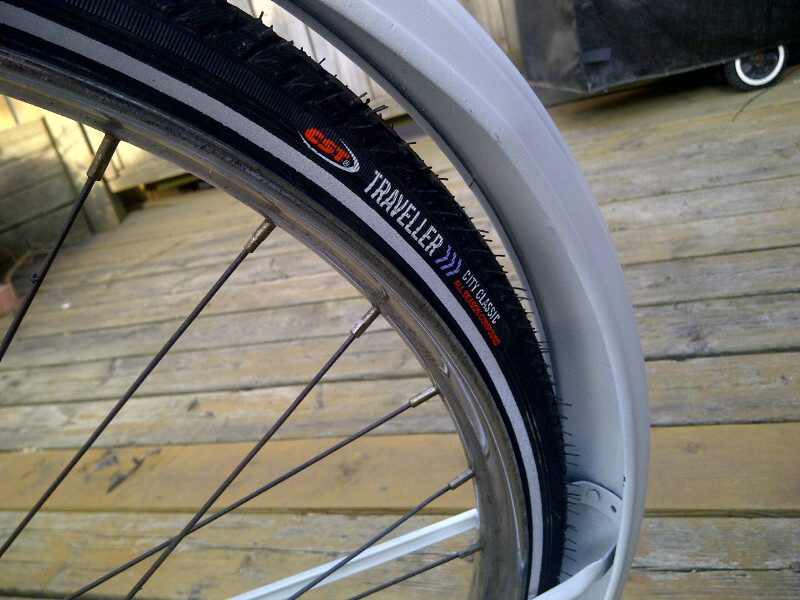
— bionic legs: the bike’s wheels — check. Bearings are cleaned and repacked, spokes are freed, new rubber and tubes complete the rebuilt wheels.

Toronto-20140526-01955

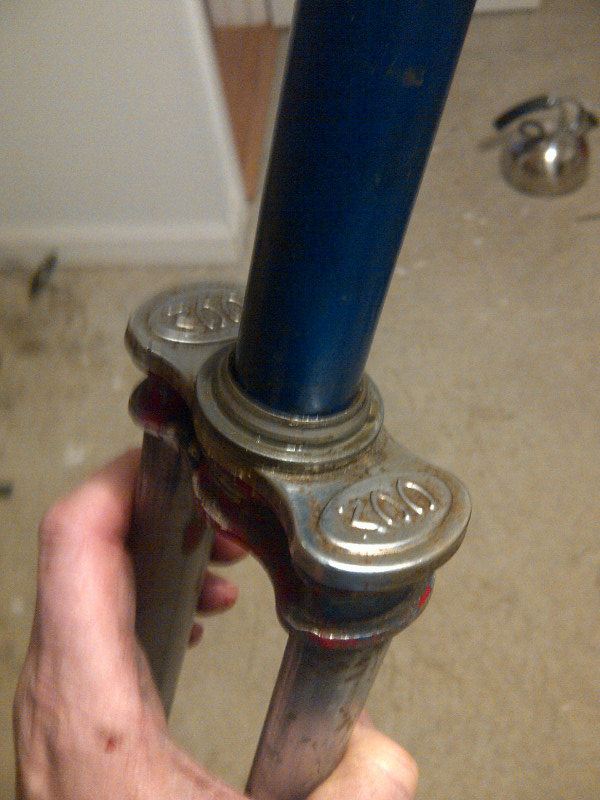
— a bionic eye — check. The original CCM fork caps complement the bike’s bionic eye — the original CCM head-badge installed when the bike was built at the Weston plant in Toronto. The eye will guide the bike along future roads less travelled.

— bionic arm — check. An aftermarket yet sturdy Swedish kickstand sits the bike up nice and straight when it’s not in motion.

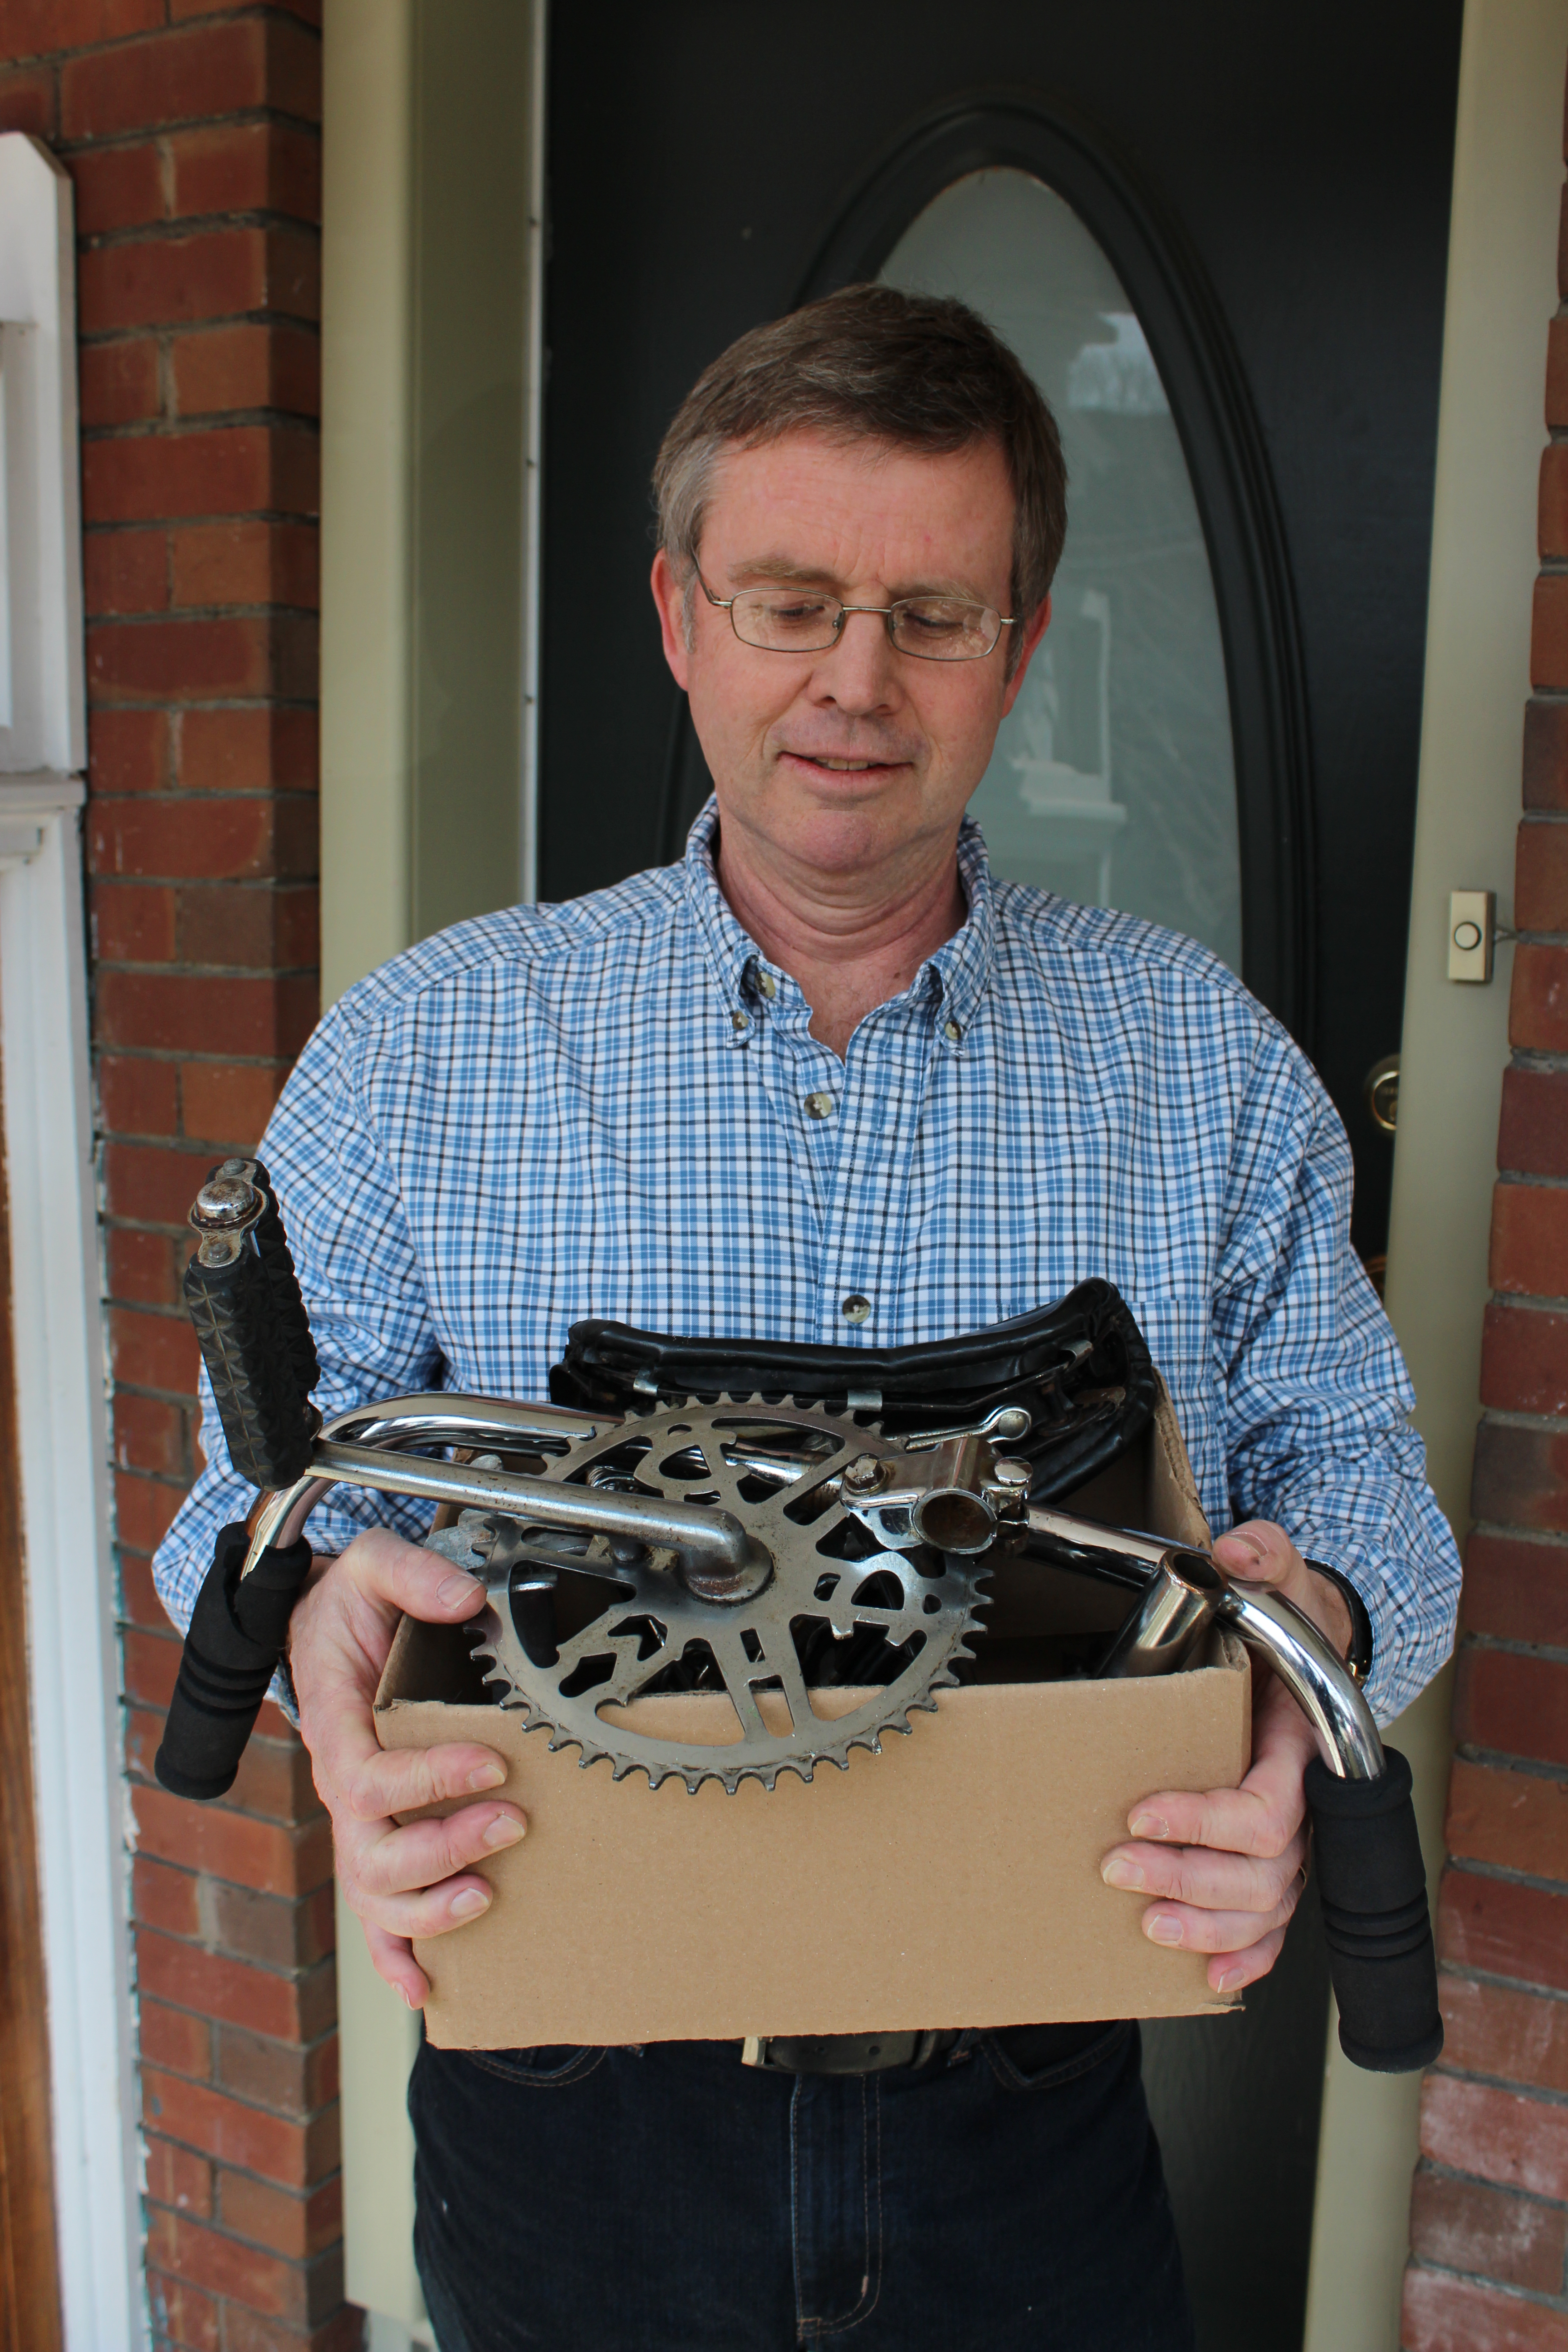
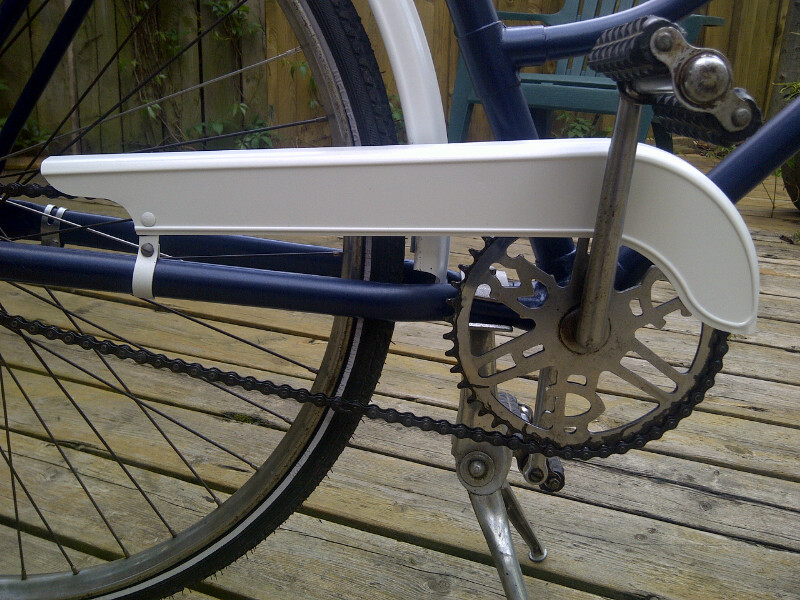
— and finally, the atomic core. The CCM brand is built into the architecture of the pedal crank, and the elegant one-piece pedal arm is back in place with clean bearings. The bike’s frame and forks are restored to their original true-blue tone.

Toronto-20140603-01961

Cue slow motion visual sequence and electronic “dit dit dit” synthesized sound effects.

The bike is back in motion heading west-bound on Nealon Avenue. Kids playing ball hockey sweep their net back to let the CCM pass. Their eyes zoom in like telephoto lenses on the sharp new period decal on the bike’s downtube, obtained from a gent in Truro, Nova Scotia.

The mechanic stands up in the pedals, sweeps southbound on Arundel Avenue. The new wheels and tires give a smooth ride. A pounding sound creszendos to fill the soundtrack — it is the beating heart of the bicycle mechanic, riding one-handed and fumbling with his blackberry to take photos of the test ride while an automobile tries to squeeze by headed east on Browning. Flight com, this is no time to drop the bike.

Toronto-20140603-01980

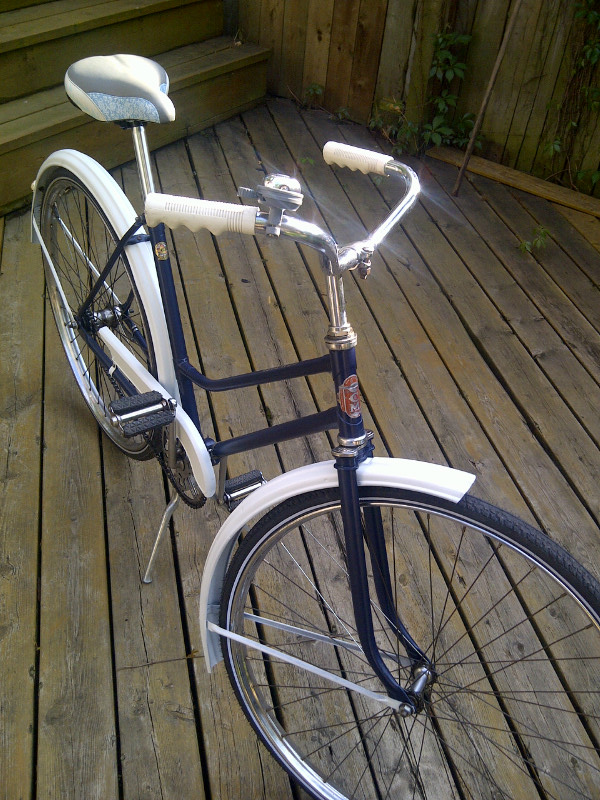
Finally we are headed back north on Logan. The Norway maples in Riverdale are in lush green bloom following a hard Canadian winter. Soon the bike will be headed back to Quinton and the Blue-Bradshaws in Kingston for some summer fun.

The 1964 CCM vintage one-speed is back in motion, 50 years young, better than she was before.

Better… stronger… faster.


Toronto-20140603-01976


Shades of blue — fresh paint for the CCM

You’re standing in the automotive paint aisle at Canadian Tire clutching the front fork of a 1964 CCM Ladies one-speed. The fork tube retains a priceless piece of the bike’s DNA — the only intact strip of true blue original paint.

Your mission is to find a close match to bring the bike back to its original dark blue tone. The store shelves present a wall of perhaps 100 colours in no particular order, including about a dozen scattered blue options. You scan the lids of the spray cans and pinpoint a Dark Blue Metallic. There are two cans of the stuff, but you want to be sure of the paint match. There’s a Royal Blue that’s good, but not metallic. An Indigo Blue is bold, but too bright.

Meanwhile, a father and son combination have joined you in the automotive paint aisle. Like you, they are scanning the paint colours, and starting to finger some of the… yes… blue paint bombs. Feigning nonchalance, but with your heart rate accelerating, you return to stand in front of the last two remaining cans of Dark Metallic Blue. You hover for a moment, then pounce to grab both cans. You glance sideways and catch a fleeting glimpse of the son, who just might be giving you the evil eye. But you have your blue paint and you are sticking to it.

For the bike’s white fenders, you select Candy White, which seems to be of little interest to your father/son competitors. Grabbing a can of primer and clear coat as well, you head for the cash. You initiate small talk with the Canadian Tire cashier, asking how she’s doing. “Super tired,” she replies. “I was up late watching a Disney show with my brother.” You tell her you were up not so late watching Downton Abbey with your wife. “My mom is obsessed with that show,” the cashier replies, and suddenly you feel your age.

Toronto-20140506-01903

Back in the kinrosscordless workshop, it’s a bit stuffy for spray-painting inside, and you don’t want your better half inhaling fumes through the forced air system. It’s been a crappy winter but the weather is brightening, so you set up your paint shop in the backyard. A piece of 1×6 from your neighbor’s old fence serves as a good painting stand for the frame, which can be balanced in three different positions for maximum paint coverage. Your Dogwood tree has yet to bud, and a crook in one of the branches is a great place to hang the bike fork.

You catch some luck on the weather as the temperature hits 15C — okay for painting. Duct tape comes in handy to tape off the parts that don’t want paint — such as the original CCM headset badge, and the housing for the pedal bearings. Finally, you patent a cost-efficient method for painting the bike fenders and chain guard — tomato cages. The cages are stuck firmly in the ground and let you balance and flip around the fenders as required for painting.

Toronto-20140506-01901

The frame and forks have been stripped then sanded with 400 and 800-grit. You apply a coat of primer to get started and to smooth out some of the bike’s war wounds that remained after sanding. The spray bombs are a bit finicky but you start to lay on a series of light coats to build the base.

The fenders took more than elbow grease to get to the painting stage — you had some professional help from a young guy at Mayfair Plating on Carlaw. For the price of a few Starbucks lattes, he sandblasted away several caked-on coats of paint and accumulated rust.

The Dark Blue Metallic and Candy White go on in multiple coats, with a minimum of 10 minutes to dry before recoating.

Toronto-20140506-01898

Painting a bike is a mix of ballet and hot yoga, at a much better price. You’re getting close to the final step — applying a protective clear coat. But first, you’ll need to read instructions from a gent in Truro, Nova Scotia. He has sent a couple of period CCM decals in the mail. You will need to absorb the steps to apply the “water-slide” decals before the clear coat goes on.

Meanwhile, the 1964 Vintage CCM has returned to its original true blue.

Bike in a box

With the frame almost ready for primer and paint, and the steel wheels sporting new rubber, most of the remaining parts of the 1964 CCM cruiser are packed temporarily into a cardboard box.

The clock is ticking on the restoration, as Quinton is arriving back in Canada in May after an exchange in France. Let’s break down the contents of the bike-in-a-box with the hopes that these parts will make it back onto the frame in time — and in the right places. The box includes:

— a sturdy one-piece pedal crank and arms. The ingenious engineers at CCM created this integrated design, which fits nicely into the pedal bracket on the bottom of the frame. The design requires just one pedal to come off to remove the whole unit. No pesky cotter pins are required for the pedal arms, and therefore there is no risk of a pedal arm getting loose on the bike. The bearings are cleaned and ready to be repacked for a smooth drivetrain action.

— a short chrome seat tube. We will need to replace this with a slightly longer tube so the rider’s knees can straighten out while pedalling. Adults may have been shorter on average when the bike was built in 1964. The dude at Cyclemania on Danforth will have a longer chrome seat post, or I may have one kicking around in my drawer of bike treasures in the kinrosscordless workshop

— the black made-in-Japan seat is not original; we’ll find a modern seat that provides comfort and blends in with the bike’s retro character.

— the handlebar post was removed from the fork with the help of some primal screaming and my father-in-law’s vice; it has about an inch to spare to make the handlebars higher so we’ll use the original post

— the handlebars look original but the handgrips are aftermarket black foam and a bit ratty. The folks at the VintageCCM web site have told me that the bike had original white handgrips so we will scout for a new pair of white grips. They will nicely complement the bike’s white fenders, and counterpoint the frame’s true blue metallic tone.

— the original rear reflector on the rear fender is a bit banged up but will add character. The fenders are being stripped of paint, including a bad brushed-on paint job from a few years back, and will look sharp.

— the pedals are both original and in good condition and will get some lubrication before they are back on the bike. Some great videos on YouTube show the proper procedure for pedal removal — the thread pattern on the pedals are opposite to each other, so you can damage the pedal if you are wrenching it the wrong way with your adjustable. When the bike mechanic was younger he knew the principle behind the opposite thread pattern; now it’s easier and more entertaining to look it up on YouTube.

— the two-pronged kickstand is non-original but highly functional and non-intrusive so will get bolted back onto the bike once the paint is done

— some period CCM decals have been ordered from a gentleman in Truro, Nova Scotia, a fellow participant on the VintageCCM web site. Wayne has created sharp replicas of post-war CCM decals, and has dropped a couple into the mail. They will go on the seat tube and down tube to complement the original CCM metal badge on the front tube.

— the chain is soaking in varsol in an empty cat-litter pail. It’s caked in grime and will need a couple of varsol baths and lubrication before it goes back on the bike.

As George Michael sang, You gotta have faith…

The bike-in-the box parts will soon be installed on the CCM frame, with some fidgeting, finessing, praying and cussing.

Stay tuned.

IMG_5000

Working on your core

Prepping the bike for paint means working on your core – the steel frame manufactured 50 years ago at CCM’s Weston plant.

After all the bike’s parts have been removed, and scattered about the kinrosscordless workshop in various stages of repair, you arrive at a 7.2-pound frame.

Toronto-20140324-01858

You determine the weight the same way you weighed your cat before a trip to the veterinarian – by stepping on the bathroom scale with and without the object to be weighed.

In the case of the CCM frame, the math works out as follows:

The bike mechanic, fully clothed and clutching the bike frame, at 192.6 pounds

LESS  The bike mechanic alone (and still fully clothed) at 185.4 pounds

= a net weight of 7.2 pounds for the frame.

Your British dad would have described that as “half a stone.”

The bike’s core is a thing of beauty. Most of the paint has been removed. You used a combination of paint stripper, putty knives, 300-grit sandpaper, a dust mask, and elbow grease. Some of the bike’s war wounds take extra effort to sand down, and some, especially on the forks, are beyond remediation so will remain as part of the bike’s DNA.

The non-original red paint is gone, and the gold-coloured hand-welds of the tube joins have emerged.

You needed extreme measures to remove the front fork, with assistance from your father-in-law’s vice, some WD-40 and occasional primal screams.

IMG-20140301-01810

But once the fork was off, a pristine strip of the bike’s original true-blue paint was revealed. This can be matched later to restore the bike to its original paint colour.

IMG-20140301-01829


You took an Earl Grey tea break to watch some YouTube videos of the pros painting bikes. One features an almost ballet-like sequence of the painter twirling the bike as it is suspended from the seat tube by rope. He patiently puts on light coats of paint from a spray bomb. Another series on YouTube called Locked-In offers great primers (no pun intended) on bike painting and all aspects of bike repair.

You are refreshed and have your inspiration, but working on your core will require on final step before paint – sanding the vintage CCM with 800-grit paper for a smooth finish. You are planning to watch a rerun of Downton Abbey’s season 1, episode 5, as there is no Leafs’ game on this evening, but the night is young.


Getting your bearings

Every 50 years or so, the wheel bearings and hubs on the Blue-Bradshaw CCM get a Varsol bath, whether they need it or not.

Photo: Every 55 years or so, the wheel bearings in the Blue-Bradshaw CCM cruiser should get a bath, whether they need it or not.

The front wheel on this 1964 bike is original CCM and a straightforward job. Once the lock washer is off you pull out the bearings. They come in a clip for easy removal and installation. That’s a luxury compared to some wheels equipped with loose bearings, one of which usually falls out in your haste to extract them. This can lead to an all-fours scavenger hunt on your basement floor.

You fish around in your blue bin for a suitable plastic container that will become the bathtub for your bearings. The bearings are immersed in Varsol and gently jiggled with a screwdriver to loosen the gunk, then rolled on clean paper towel until clean.

Photo: Bearings are ready for a Varsol bath. Mind you don't splash the white dress shirt you're still wearing from your day job.

You apply a liberal coating of Teflon Super Lube to the bearings, repack the hub and adjust the lock washer so the wheel runs smooth but tight.

Photo: Some Teflon superlube is an upgrade from regular grease

The next bath is scheduled for 2064, when this bike mechanic will be 103 years old. Is it possible to book that in your Microsoft Outlook Calendar?

The rear wheel is more complex and compelling. It is a UK-built Dunlop, likely added at some point to keep the bike going when the original CCM wheel, with Hercules hub, was damaged. The Dunlop wheel sports a New Eadie rear hub and coaster brake, a make associated with the UK BSA company, famous for motorcycle building.

Toronto-20140127-01734

The hub is a work of art and engineering. Its bearings float the bike on the wheel, and inside the cylinder resides an ingenious coaster brake mechanism. When the rider backpedals, the mechanism engages a drum that presses into the inside of the hub, braking the bike.

Toronto-20140124-01729

The coaster brake reminds you of your first bike, a red one-speed beauty. You remember the sudden realization that your Dad had let go and you were pedalling solo down Shadwell Place. You took the turn around the cul de sac island too fast, hit the curb, wiped out and chipped your tooth.

But you were right back in the saddle and exploring the winding roads and ravine trails of Don Mills with your buddies. After a while you developed a special talent for braking the bike while riding with no hands, a trick exercised with a certain air of nonchalance.

You are not religious, but reassembling the New Eadie coaster brake is an act of faith. Following the standard Varsol bath and coat of Super Lube, everything clicks into place. The hub adjustment is a bit finicky and will need to be checked again when the bike is road tested.

But for now, you have got your bearings. The wheels on this vintage bike are true with spokes adjusted or replaced, and ready for some new rubber.

Steel wheels

Today’s bike repair challenge: The sturdy 28-inch steel and chrome wheels on Quinton’s classic CCM cannot be trued because many spokes are seized.

Solution: Your first step is to pull the tire using methods handed down by your Don Mills neighbor Mr. Harmer, who rebuilt old bikes pillaged from the garbage in the ’60s and ’70s.

Photo: Challenge: the sturdy UK-built front wheel on Quinton's 50s CCM cruiser cannot be trued because many spokes are rusted solid.

He gave bike repair clinics to you and your friend Craig Harmer (his son). The first was how to wield screwdrivers to pull a tire and repair a puncture — pronounced “poonctcha” in Mr. Harmer’s Yorkshire accent.

The screwdriver method can cause some interesting self-inflicted injuries during puncture repairs, so as a boy you purchased CCM tire tools from Norwegian Ski Shop at Don Mills Plaza. The tire tools had better leverage and less sharp edges. You still have them handy in the flotsam and jetsam of bike repair stuff in your toolbox.

Photo: You must pull the tire using methods handed down by your Don Mills neighbor Mr. Harmer, who rebuilt old bikes pillaged from the garbage.

Once the tire and tube are pulled, the problem spoke threads on the 1964 CCM get treated with WD-40 plus some Superlube Teflon grease you bought at the Don Mills Canadian Tire — the gift that keeps on giving.

For the half dozen spokes that absolutely will not give, you pay a visit to the gent who owns the Cyclemania bike shop on the Danforth. He produces matching spokes at 50 cents a pop. Some people are scared of this guy’s gruff manner and Eastern European accent. The fact is he is a top-tier bike mechanic and a keener for all things bike-related.

Back at home, you clip out the old spokes with wire cutters and weave the new ones into the wheel’s spoke pattern. Listening to CBC radio gives you the right Karma to wrestle the new spokes into place one by one.

The wheels are now ready to be trued — which will iron out wobbles and make this vintage bike run straight. A cheap true key on the 15 mm setting will do the trick.

To find the major wobbles in the tire you can spin it on the bike fork and use a thumbnail to diagnose the problem areas. This is a cheaper option than a professional truing stand used by bike repair shops.

Then loosen and tighten alternating spokes appropriately to coax the rim back into true.

Photo: Once the tire and tube are pulled, the problem spokes get treated with WD-40 plus some superlube grease you bought at the Don Mills Canadian Tire in the 70s -- the gift that keeps on giving. The rim can now be trued.

But it’s getting late and you have a day job. Say a quick thank you to your bicycle repair muse Mr. Harmer, and set your alarm clock.

The next bike repair challenge in our CCM restoration will be an overhaul of the front and rear hubs.

Photo: But you have a day job. The hub overhaul awaits.

In the meantime, here is…

More on the art and science of bicycle wheel spokes:

Some fascinating background on spokes comes from writer David Fiedler in the Bicycling section of About.com. He describes the beauty and complex functionality of the spoke, including its role to provide integrity to the wheel and to transfer power from the rider to the rubber that hits the road. Even Shakespeare with his rhyming couplets and iambic pentameter could not have paid a better tribute to the bicycle spoke:

The spokes on your bike’s wheels are like the busboys at the restaurant. They’re quiet and out of the way, and it’s pretty much a thankless job. No one ever notices when everything is working well, but without proper set up and operation, all sorts of trouble will break loose.

What Spokes Do

The spokes on your bike may look like little more than metal toothpicks that fill space between the axle and wheel but really, these mighty little dudes have an important job.  They do a couple of things:

  • Add strength to your rim
  • Transfer your leg power from the hub to the wheel
  • Support your weight on the wheel

How Spokes Work

How the spokes accomplish these terrific and heroic feats? First, spokes don’t push outward, holding the rim at bay, like it might seem. Rather, the rim is evenly pulled inward by spokes that are laced through the hub, the center part of the wheel that rotates around the axle, which makes it extraordinarily strong. These spokes coming from the hub then radiate outward to the rim, where they attach to nipples, which are almost like little nuts resting in the rim. The nipples can be screwed down onto threaded tips of the spokes, which increases tension on the rim, and also pulls it slightly to the left or right.

Another important job of spokes? Playing a key role in the transferring the power from your legs to the rim to make the bike go. Enormous force gets applied to the hub of a rear wheel by the chain and gearing when you pedal down hard, and together the spokes carry the power that has gone from your legs to the chain then out to the wheel.  That force driving the bike forward gets distributed among many spokes in a properly aligned wheel, which people usually describe as being “in true.”  When you look at weight distribution, too, even under a very heavy load many spokes help spread out the weight so that it is more evenly carried and doesn’t put too much stress on any single spoke.